Notice:
You have to select only two columns from the excel sheet and this two columns must be student id and student name columns.
You can download MCQ application from our website
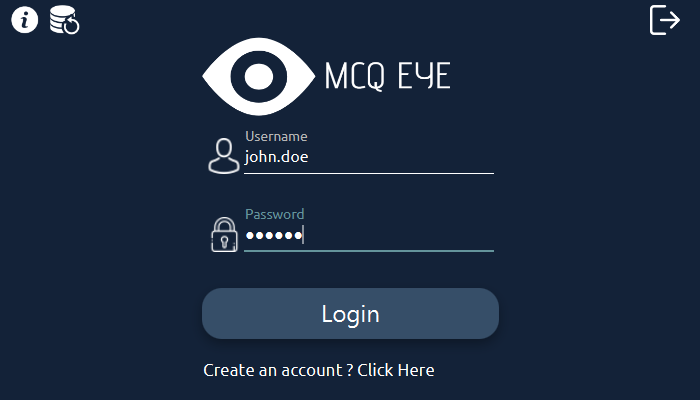
Download MCQ-EYETo use the program you have to create account all your data will be linked to this account and password is encrypted for your account safety, you can delete your account at any time or modify your account information.
- Click the click here button in the login window
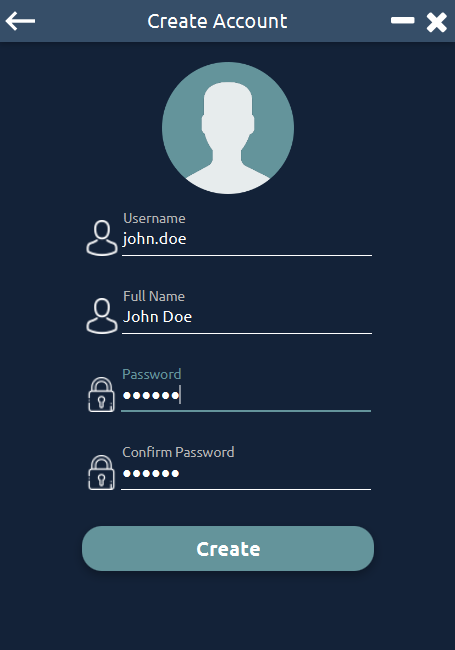
- Enter username must be unique without any spaces
- Full Name (Display Name)
- Enter your password must be 6 or more characters or/and numbers
- Enter password again for confirmation
- Click create button and it's done !
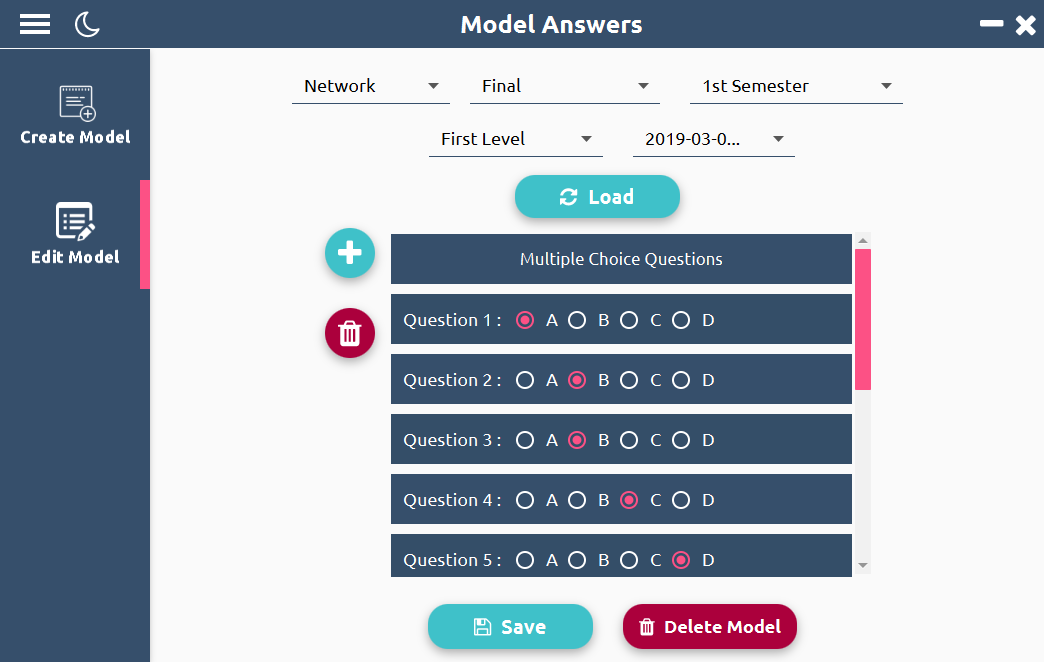
First thing, You need to create model answer as the model answer is the basis for the program to work, also it's used for grading students, reports generating and all graded students data are stored under this model answer.
- You have to specify the method for creating the model answer whether by scanning the model answer paper or enter the model answer directly via the program.
- Course name (Subject Name)
- Exam Type (e.g. Midterm, Final ... )
- Semester
- Exam Level
- Number of questions if answers will be added directly via the program
- You have to specify which model to modify by selecting it's information.
- You can add or delete questions ( minimum number of questions 10 and maximum 100 ) by the plus button in the left of the questions list you can add questions and the bin button used for deleting the question after selecting it. and saving changes using save button
- You can also delete the model and it's corresponding data by pressing delete model button.

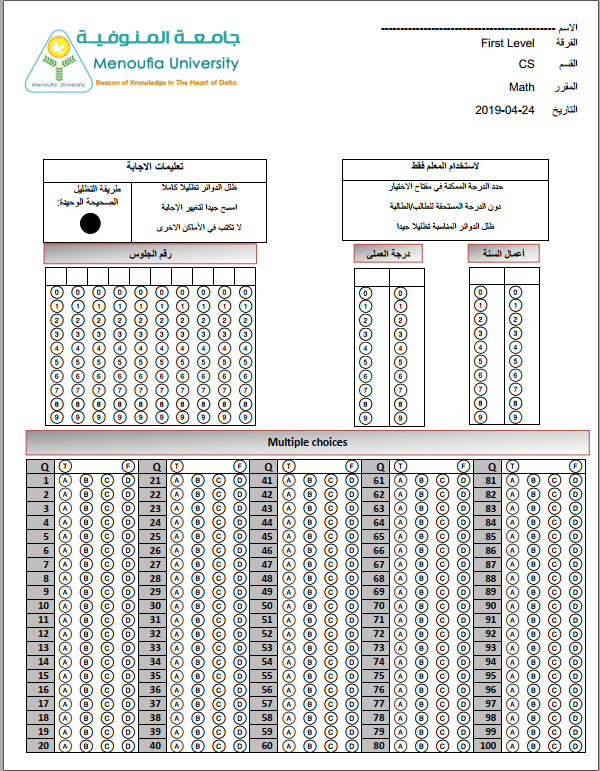
In this step you can create question paper for students with customizable header but the number of questions in paper is fixed ( 100 question/paper ).
- You have to specify the subject name (Course name), level, department, exam date, univirsity logo path, and finally the language of the paper (you can select between arabic and english this will change the language of the instructions and header of the paper)
- by clicking create this will show save dialog to select where to save the paper
- paper is saved as PDF file

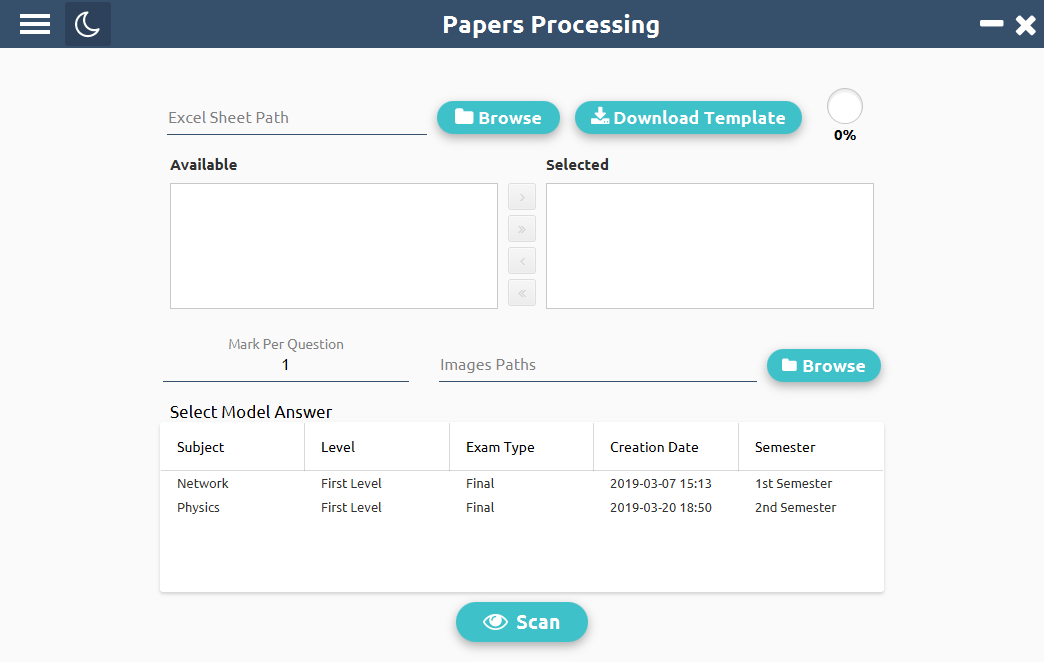
In this step you can grade scanned exams by openning papers processing window in the navigation drawer this process requires excel sheet with two columns student ID column and name column or in arabic (اسم الطالب و رقم الجلوس), all images will be graded and compared to the excel sheet if the id in the scanned paper is found in the excel sheet then the student name will appear corresponding to his/her mark and another excel sheet will be generated containing student name with and all marks information.
You have to select only two columns from the excel sheet and this two columns must be student id and student name columns.
It's recommended to download our excel sheet and fill it with your data without any changes in columns name using download template button you can download the excel sheet on your computer .
- Browse and select excel sheet file wait till the file loading is done if the loading is select the two columns (student id , Student Name) columns
- Click Browse and select all scanned image you want to mark
- Specify the mark per question (by default 1 per question)
- select the model answer that will be used in the grading process from the table (Double click on the model answer will display popup with the answers)
| # | Button | icon | Action |
|---|---|---|---|
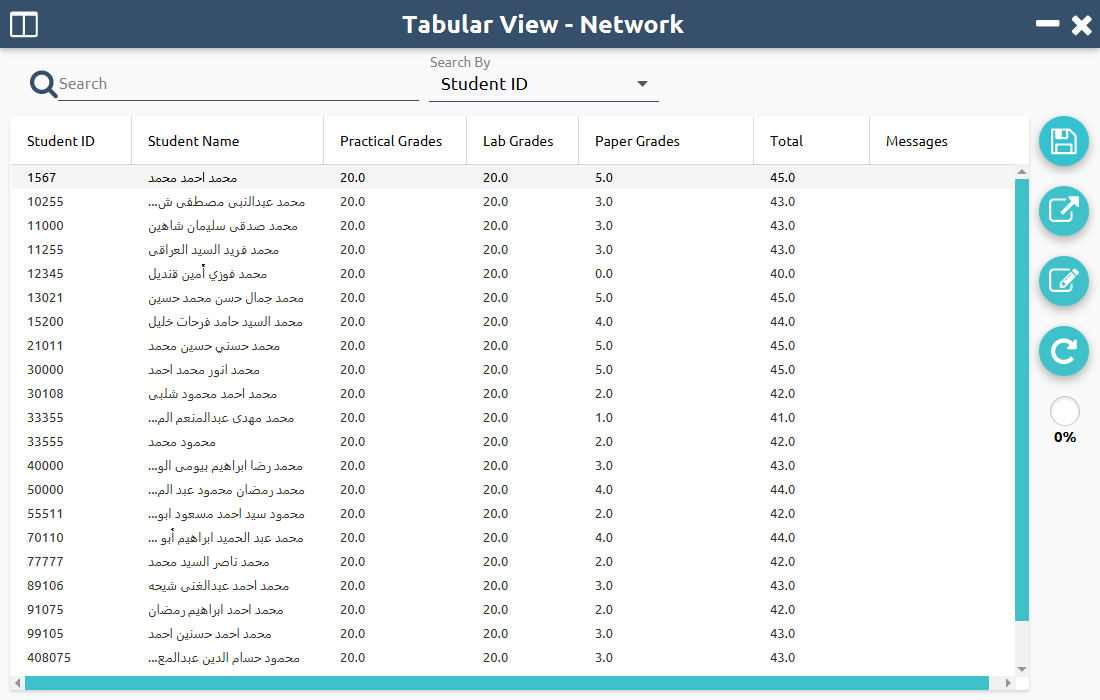
| 1 | Save | this button will allow you to save the results in the database for generating reports and statistics | |
| 2 | Rescan | after selecting the image this button will allow you to rescan another image if the image is unsuccessful or the result isn't correct | |
| 3 | Export to excel | This button export all results to excel sheet after clicking on this button will display save dialog to save the excel sheet | |
| 4 | Edit Result | This button will allow you to manually edit the result and will open the detailed view window | |
| 5 | Switch Button | This button will allow you to switch between tabular and detailed view |
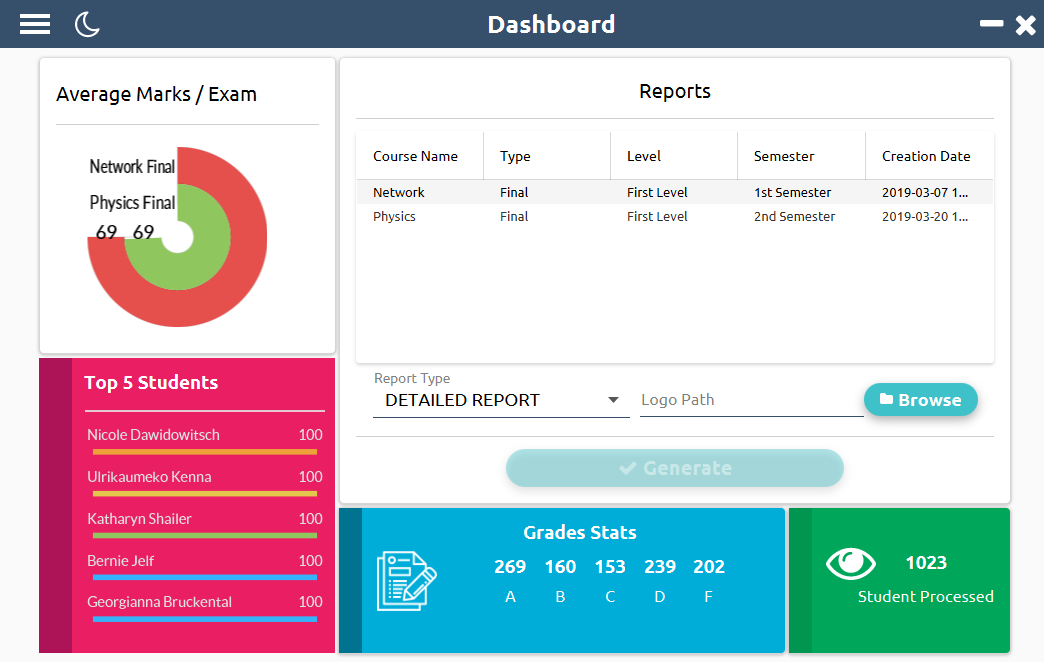
Finally after grading and saving the exam, now it's time for reports !, you can generate and export reports and stats in the dashboard window you will see all exams that processed after selecting any exam from the table the stats will be displayed
- Open dashboard window from the navigation drawer
- Select any exam from table
- all stats cards will be changed corresponding to the selected exam
- provide Faculty or Unvirsity logo path
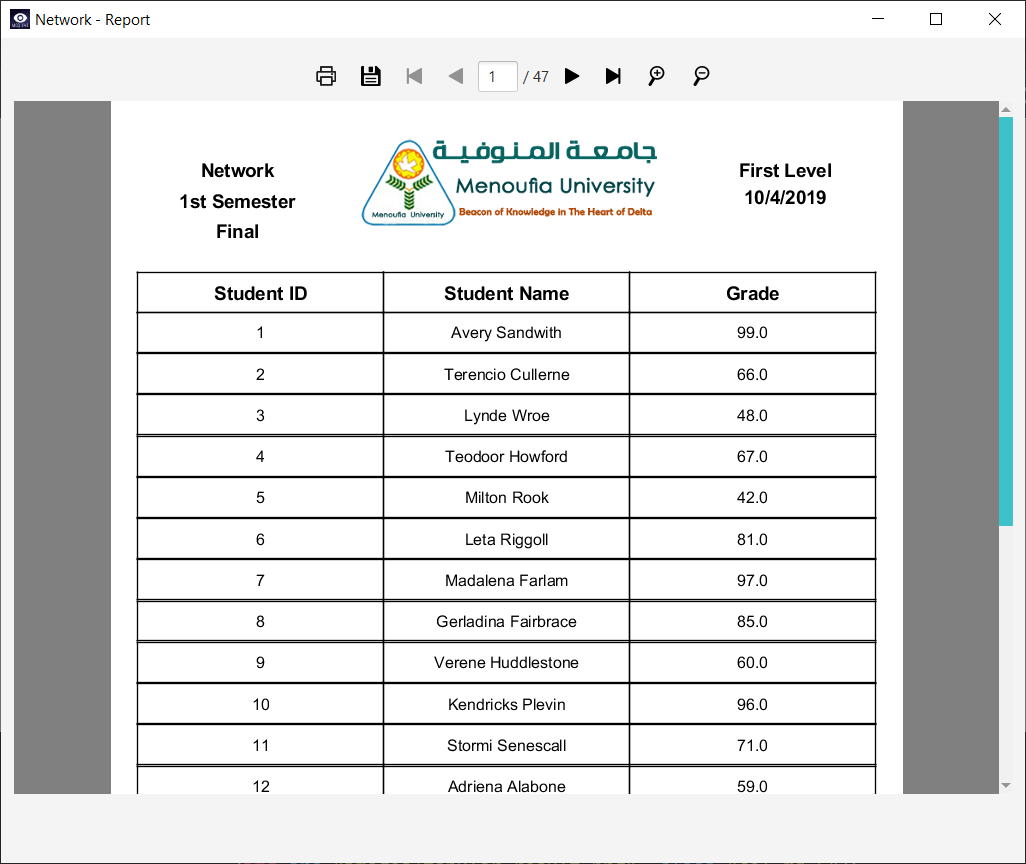
- Clicking Generate will display the report in new window you can save this report in many formats (PDF, Excel, Word ... )